Recent Updates Toggle Comment Threads | Keyboard Shortcuts

  • CG 8:15 pm on May 28, 2017 Permalink | Reply
    Tags: image recognition, ,   

    Image Recognition with TensorFlow – python 

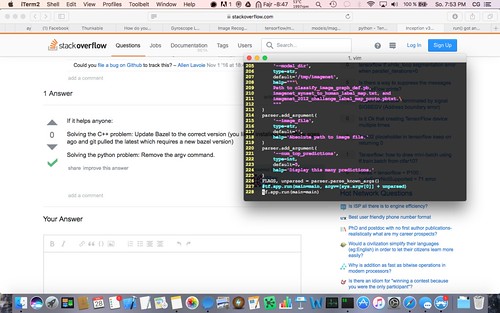
    Bildschirmfoto 2017-05-28 um 7.53.32 PM Bildschirmfoto 2017-05-28 um 7.53.56 PM

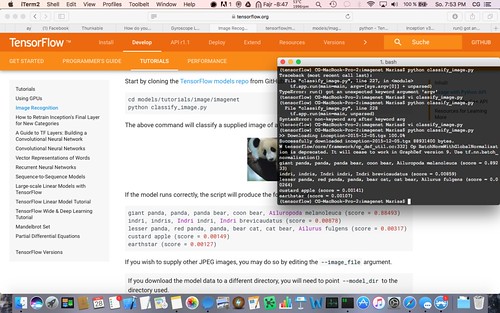
    1. Start with this link https://www.tensorflow.org/tutorials/image_recognition#usage_with_python_api
    2. Download TensorFlow models repo from Github here https://github.com/tensorflow/models/blob/master/inception/inception/image_processing.py
    3. If you got errors with python, go here https://stackoverflow.com/questions/40357548/inception-v3-guide-on-tensorflow-broken-for-c-and-python
      or
      https://github.com/samjabrahams/tensorflow-on-raspberry-pi/issues/47
    4. Remove the argv command
     
    • Brooks 11:35 am on June 30, 2017 Permalink | Reply

      magnificent issues altogether, you just gained a emblem new reader. What may you recommend about your publish that you made some days ago? Any certain?

    • restaurant frankfurt oder 1:39 pm on June 30, 2017 Permalink | Reply

      Grüße! Sehr hilfreiche Beratung in diesem Beitrag! Es sind die kleinen Veränderungen, die die größten Veränderungen bewirken werden. Danke für das Teilen!

    • anexo monografia 2:52 am on August 31, 2017 Permalink | Reply

      Heya i’m for the primary tikme here. I came across this board and I in finding It really helpful & it helped me out
      a lot. I hope to offer one thing again and aid others like you helped me.

    • Sarjoni 1:39 pm on January 13, 2019 Permalink | Reply

      Thank for share,

  • CG 9:54 pm on May 26, 2017 Permalink | Reply
    Tags: macos, pip, , Sierra, , virtualenv   

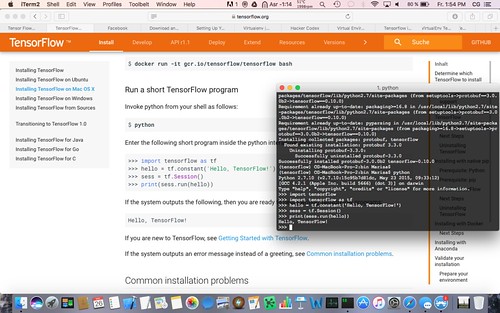
    Installing TensorFlow on MacOS Sierra 

    I can’t remember every steps but I need to leave some notes that I can refer to later 🙂 I just put everything I can remember here 🙂

    The directory:

    cd /usr/local/lib/python2.7/site-packages/tensorflow/bin
    source activate tensorflow

    code example to test

    >> import tensorflow as tf
    >>> hello = tf.constant(‘Hello, TensorFlow!’)
    >>> sess = tf.Session()
    >>> print sess.run(hello)
    Hello, TensorFlow!
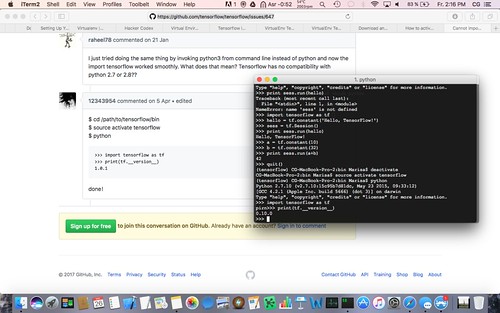
    >>> a = tf.constant(10)
    >>> b = tf.constant(32)
    >>> print sess.run(a+b)
    42
    >>> quit()
    (tensorflow) CG-MacBook-Pro-2:bin Marisa$ deactivate

    Activating virtualenv

    $ cd /path/to/tensorflow/bin
    $ source activate tensorflow
    $ python
    >>> import tensorflow as tf
    >>> print(tf.__version__)
    1.0.1

    Important links:

    1. https://www.tensorflow.org/install/install_mac#the_url_of_the_tensorflow_python_package
    2. https://thkim.org/tensorflow/tensorflowinstallation/tensorflowinstallationvirtualenv/
    3. https://github.com/tensorflow/tensorflow/issues/647
    4. https://codedump.io/share/6Oq22H5Uhoab/1/virtualenv-tensorflow-instalation-validation-with-importerror-no-module-named-tensorflow
    5. https://stackoverflow.com/questions/43647090/virtualenv-tensorflow-installation-validation-with-importerror-no-module-named
    6. http://python-guide-pt-br.readthedocs.io/en/latest/dev/virtualenvs/
    7. https://hackercodex.com/guide/python-development-environment-on-mac-osx/
    8. http://sourabhbajaj.com/mac-setup/Python/virtualenv.html

    The journey:

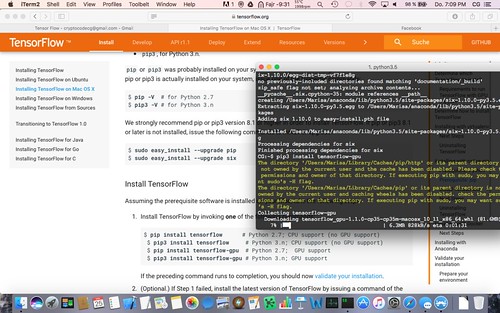
    Downloading TensorFlow

    Bildschirmfoto 2017-05-25 um 7.09.57 PM

    Install and update

    Bildschirmfoto 2017-05-25 um 7.18.58 PM

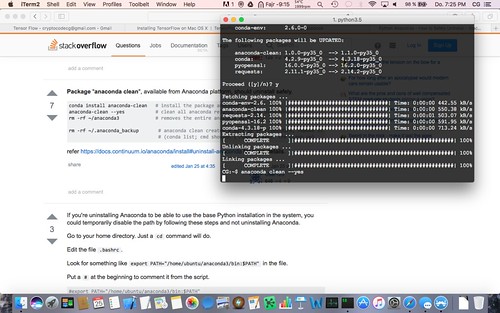
    Removing Anaconda

    Bildschirmfoto 2017-05-25 um 7.25.06 PM

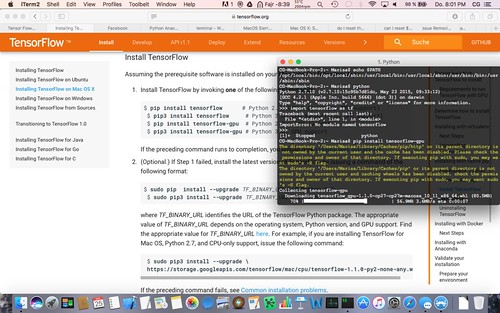
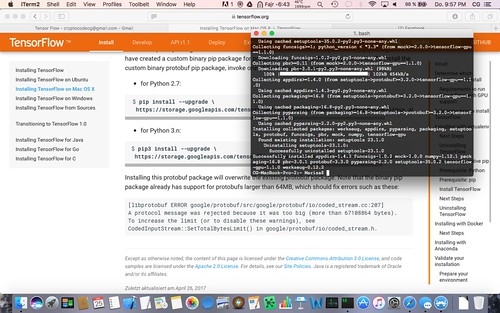
    tensorflow library couldn’t be recognized. Installing gpu version

    Bildschirmfoto 2017-05-25 um 8.01.42 PM

    installing for python 2.7

    Bildschirmfoto 2017-05-25 um 9.57.24 PM

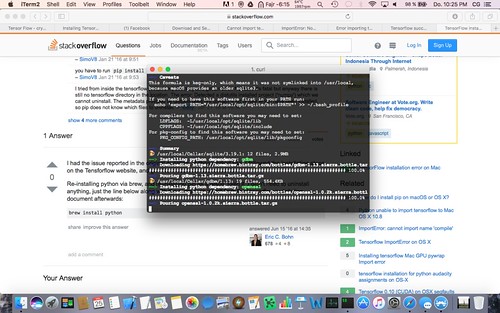
    reinstalling python and fixing the PATH

    Bildschirmfoto 2017-05-25 um 10.25.47 PM

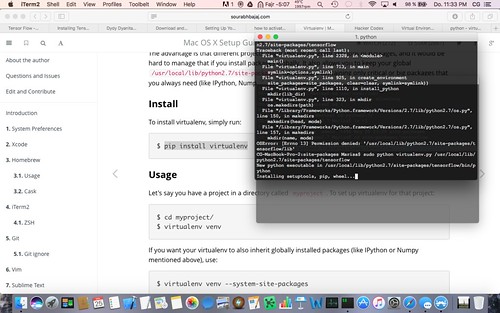
    installing virtualenv

    Bildschirmfoto 2017-05-25 um 11.33.43 PM

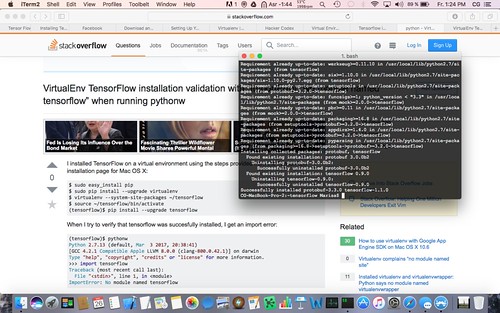
    installing tensorflow on virtualenv

    Bildschirmfoto 2017-05-26 um 1.14.44 PM

    tensorflow had been successfully installed on virtualenv

    Bildschirmfoto 2017-05-26 um 1.24.11 PM

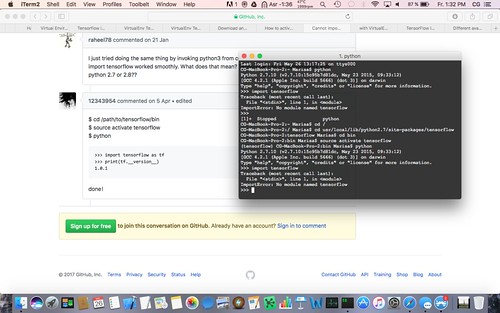
    tensorflow library still not recognized

    Bildschirmfoto 2017-05-26 um 1.32.30 PM

    finally figure out how to activate the virtualenv

    Bildschirmfoto 2017-05-26 um 1.50.15 PM

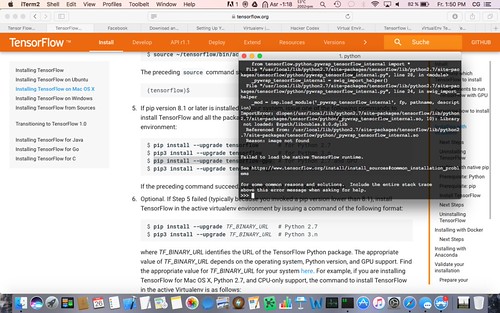
    library recognized but there were errors!

    Bildschirmfoto 2017-05-26 um 1.50.42 PM

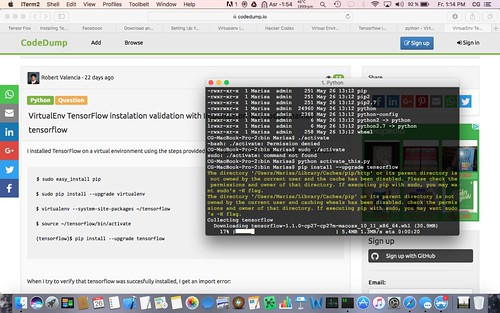
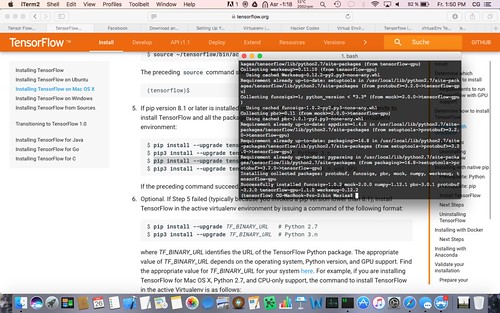
    reinstall tensorflow to the activated virtualenv, and it worked!

    Bildschirmfoto 2017-05-26 um 1.54.14 PM

    YES!!! 🙂 Now I’m ready to explore! 😉

    Bildschirmfoto 2017-05-26 um 2.16.10 PM

     
  • CG 6:32 pm on March 22, 2015 Permalink | Reply  

    Fixing Java that cannot be re-installed after being uninstalled 

    One of our computer,  on 64-bit Windows 7,  being used for Minecraft programming using CanaryMod and Scriptcraft so the coding can be done in JavaScript, having troubles after we did so much modding so we had to uninstall the (32-bit) Java.

    The problem was that Java could not be reinstalled because the uninstalling process was not clean so that Java files were still in the registry, made the Java installer thought that Java was already installed.

    We have download like ten registry cleaner software, tried 3 or 4 of them but the problem remained. Until we find a very useful ilnk that finally made the installation work.

    The trick is to type <pre><code>regedit</code/</pre> on Windows start menu and then find any folder contains Java on the folder under <pre><code>HKEY_LOCAL_MACHINE\SOFTWARE\CLASSES\INSTALLER\PRODUCTS</code></pre>. This is a bit tedious but it is totally worth it 😀

    After that delete these to folder:

    <pre><code>HKEY_LOCAL_MACHINE\SOFTWARE\JavaSoft\Java Runtime Environment</code></pre>

    <pre><code>HKEY_LOCAL_MACHINE\SOFTWARE\wow6432node\JavaSoft\Java Runtime Environment</code></pre>

    and then all will be set and the installation will be done just fine.

     
    • Need Genuine Psychics? 12:34 pm on April 2, 2017 Permalink | Reply

      If you are going for finest contents like myself, just
      pay a visit this site everyday for the reason that it gives feature contents, thanks

  • CG 1:39 pm on February 26, 2015 Permalink | Reply
    Tags: , queue, rabbitmq   

    Installing RabbitMQ on MacOS 

    1. Download RabbitMQ for Mac here
    2. Download Java AMQP client library here
    3. Start RabbitMQ server by running ./rabbitmq-serverBildschirmfoto 2015-02-26 um 11.10.15 vorm.
    4. Check that the server is running properly with ./rabbitmqctl statusBildschirmfoto 2015-02-26 um 11.10.51 vorm.
    5. Compile and run a HelloWorld testing program from the tutorial here. Compile the Send.java and Recv.java files with javac -cp rabbitmq-client.jar Send.java Recv.java. Run Send.java with java -cp .:commons-io-1.2.jar:commons-cli-1.1.jar:rabbitmq-client.jar Send. This will send the message (in this case the message is “Hello World!”) to the queue. And then run Recv.java with java -cp .:commons-io-1.2.jar:commons-cli-1.1.jar:rabbitmq-client.jar Recv to pop out the message on the queue.Bildschirmfoto 2015-02-26 um 11.08.05 vorm.
    6. The server and the queues can also be checked via browser http://localhost:15672/Bildschirmfoto 2015-02-26 um 11.09.31 vorm. Bildschirmfoto 2015-02-26 um 11.08.41 vorm.

    Now the queue is ready.

     
    • Budi Rahardjo 8:20 am on February 28, 2015 Permalink | Reply

      On Linux (I know, it’s not Mac OS X 🙂 ) there’s “amqp-tools”. Install it with “apt-get install amqp-tools”. You’ll get five (5) command line tools. For example if you want to publish something:

      amqp-publish -e exchange_name -b “your message”

      To get a message from a queue:

      amqp-get -q queue_name
      or
      amqp-consume -q queue_name

      I believe these tools are built with rabbitmq-c library. Having said that, I looked at the newer version of rabbitmq-c library in here:
      http://alanxz.github.io/rabbitmq-c/docs/0.5.0/index.html

      It has a number of different tools. Perhaps they changed (upgraded?) the library? I have not looked deeper into it. Basically, it is a C library that you can use to create command line tools. I looked at one of the code, and hardcoded the userid dan password in it so I can use something like this.

      amqp_sendstring localhost 5672 amq.direct test “hello world”

      I have tested amqp-tools and this rabbitmq-c library agains locally installed rabbitmq server. They work!

    • Budi Rahardjo 8:37 am on February 28, 2015 Permalink | Reply

      And now for some clients. I have tested Perl Net::RabbitMQ. Getting it running is easy.

      Publishing message(s) works perfectly, but I am still having problems getting one (1) message from the queue. For some reasons, I got *all* the messages from the queue. ie. get and consume behave the same. I need to tinker some more with the get.

      I haven’t had time to play with Python and Java clients.

  • CG 7:55 pm on January 3, 2015 Permalink | Reply
    Tags: ant, canarymod, , minecraft, mods, scriptcraft, yosemite   

    How to run Minecraft on Mac OS X Yosemite 10.10.1 

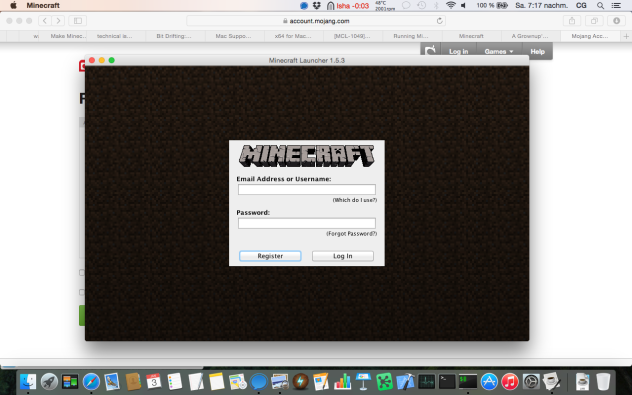
    I got this message when running Minecraft on Yosemite, and when I googled I found that this is common problems.

    Bildschirmfoto 2015-01-03 um 7.27.35 nachm.

    Some references say that the latest JDK should be installed while the earlier ones should be uninstalled. I have uninstalled the earlier and installed the latest JDK but the problem persisted.

    So I followed this reference to make it work.

    These are the steps:Install ant

    1. Download Java Application Bundler
    2. Download Minecraft.jar from here *after clicking “Show all platforms” and choose that one under “Linux and Other
    3. Create a file named build.xml and type this code in
      Bildschirmfoto 2015-01-03 um 7.22.29 nachm.
    4. Organize my file like this
      Bildschirmfoto 2015-01-03 um 7.21.13 nachm.
      *Notes: at this point, the dist folder is empty, it will contain Minecraft.app after I run ant command*
    5. Open terminal and run ant like this
      Bildschirmfoto 2015-01-03 um 7.21.56 nachm.
    6. Now the dist folder will contain Minecraft.app in it. Move it to Applications folder

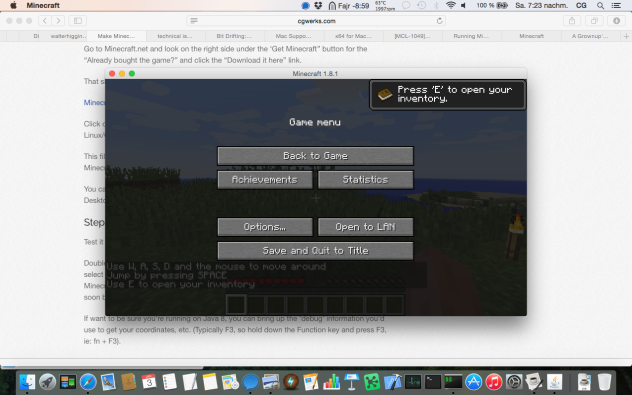
    And it works!

    Bildschirmfoto 2015-01-03 um 7.17.19 nachm.

    Bildschirmfoto 2015-01-03 um 7.23.56 nachm.

    Bildschirmfoto 2015-01-03 um 7.24.02 nachm.

    My next step is to make canarymod and scriptcraft work to make mods on Minecraft. Wish me luck.

     
  • CG 11:03 pm on May 24, 2014 Permalink | Reply
    Tags: convolutional code, , , trellis diagram, viterbi   

    Convolutional Code 

    Unlike block codes, convolutional codes does not send the message followed by (or interspersed with) the parity bits. In a convolutional code, the sender sends only the parity bits.

    The encoder uses a a sliding window to calculate r > 1 parity bits by combining various  subsets of bits in the window. The size of the window, in bits, is called the code’s constraint length. the longer the constraint length, the larger to number of parity bits that are influenced by any given message bit. Because the parity bits are the only bits sent over the channel, a larger constraint length generally implies a greater resilience to bit errors. The trade-off is that it will take more time to decode codes for more constraint length.

    If a convolutional code that produces r parity bits per windows and slides the window forward by one bit at a time, its rate is 1/r. The greater the value of r, the higher the resilience of bit errors, but the trade-off is that a proportionally ginger amount of communication bandwidth is devoted to coding overhead. In practice, it is more commen to pick 4 and the constraint length to be as small as possible while providing a low enough resulting probability of a bit error.

    This is an example of a convolutional code with rate 1/2:
    r 1:3

    This is a systematic 1/3 encoder:
    1:3

    And this is a 2/3 encoder:
    trelis-diagram

    To make the convolutional code able to cope with more errors, it is not by changing the k or n (r = k/n). But by adding more memory inside the encoder (the square with D letter). Notes that all the circles with plus symbol (or the xor process) is the generator functions to determine each output. It works just like other generator of other error correction codes.

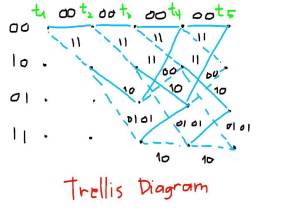
    This is the Trellis Diagram of the first convolutional code:
    2:3

    Trellis Diagram is a graph whose nodes are ordered into vertical slices (time), and with each node at each time connected to at least one node at an earlier and at least one node at a later time. The earliest and latest times in the trellis have only one node.

    This diagram gives “spatial” and “temporal” information about the code. “Temporally” it shows the state on each t while “spatially” it shows every possible route defined by the encoder design. Later, the decoding would be done by comparing the received “route” with the “most likely route” to track down the error and then correct it.

    Viterbi is a scheme for decoding, using maximum likelihood decoding that set up a threshold to check the “route” with the “deviated route”.

    References:

    1. MIT 6.02 DRAFT Lecture Notes, Fall 2010 (Last update: October 4, 2010)
    2. http://en.wikipedia.org/wiki/Trellis_(graph)
    3. “Error Control Coding”, Shu Lin and Daniel J. Costello
     
  • CG 4:06 pm on January 26, 2014 Permalink | Reply
    Tags: business, , economy, price elasticity   

    Amdahl’s Law and Price Elasticity 

    I have just noticed that Amdahl’s Law used in measuring processor performance is similar with the Price Elasticity Law (I read from the book “Starbucks (Corporations that Changed the World) – Marie Bussing-Burks”) in economic concepts.

    The same principle is that there is a limit in increasing processing performance to get more throughput, or to rephrase it in business language: there is a limit in reducing price of an item to get more revenue.

    Amdahl’s Law says that speedup is how a machine performs after enhancement. A SpeedUp(E) = Performance with E / Performance without E = Execution time without E / Execution time with E. Execution time = Execution time unaffected + (Execution time with E / Amount of improvement).

    (Notes: Examples is taken from EL 2244 Course being taught at ITB this semester. The reference book is John L. Hennessy and  David A. Patterson , Computer Organization and Design: The Software Hardware Interface, Morgan Kaufmann Publishers, 4th Edition, 2009.)

    Ex. 1:

    A program runs in a machine in 10s. 50% of the time is doing multiplications. If we improve the multiplication unit so it runs twice as fast, how big is the speed up?

    Answer:

    Exec_time(E) = (Affected_exec_time/improvement) + unaffected_exec_time

    = (5s/2) + 5s = 7,5 s

    Speed_up(E) = 10s/7,5s = 1,333  which is not 2 times faster

    Ex. 2:

    A program runs for 10s. 70% of the time is doing additions. How much improvement on the additions if we want to reduce the running time to 3s?

    Answer:

    Exec_time(E) = (Affected_exec_time/improvement) + unaffected_exec_time

    3s = (7s/n) + (10-7)s

    3s = (7s/n) + 3s

    0 = 7s/n

    No amount of improvement can reduce the running time to 3s.

    Now let’s see the Price Elasticity Law. Price Elasticity (E) = % change in quantity demand / % change in price.

    Ex 1:

    If we reduce the price of 36 inch TV from $450 to $400, the average price would be $425. The absolute value of percentage change = $50/$425 = 0.118. Number of unit sold is increased from 200 to 300 so the average number of unit sold = 250.

    So the percentage  of change in quantity demand is 100/250 x 100% = 40%.

    The price elasticity = 0.4/0.118 = 3.39%

    If the absolute value of price elasticity is between 0 – 0.99, demand is inelastic. Necessity items like coffee, milk, gasoline, prescription drugs are tend to be relatively insensitive to price change.

    Ex 2:

    A store manager drops the price of a gallon of milk from $4 to $3. The average price will be $3.5. The absolute value of % change = $1/$3.5 = 0.29

    Milk sold going from 10 to 11. The average number of gallon sold = 10.5. Percent of change in quantity demand = 1/10.5 = 0.1.

    Price elasticity = 0.1/0.29 = 0.34. The demand is inelastic.

    So if demand is elastic, a price cut will increase total revenue (and an increase in price will mean lower total revenue). If we take Ex 1:

    price x quantity = total revenue

    $450 x 200 = $90,000

    $400 x 300 = $120,000

    While when demand is inelastic, a price cut will decrease total revenue. As in Ex 2:

    $4 x 10 = $40

    $3 x 11 = $33.

    The conclusion is that in terms of machine performance and total revenue, there is a limit to get “improvement”. There is a certain point that we cannot further improve the speed of a machine as well as there is a certain point that we cannot change price to get more total revenue.

     
  • CG 11:44 pm on January 10, 2014 Permalink | Reply
    Tags: channel coding, error correction, , reed solomon   

    Reed Solomon – A Brief Introduction 

    Reed Solomon is one brilliant error correction method that is a non-binary cyclic codes. The codeword looks like the picture below. It has symbols in m-bits. The bit string is treated as a group of bits. The group of bits is treated as non-binary. We will see how it makes this method powerful.

    Reed Solomon

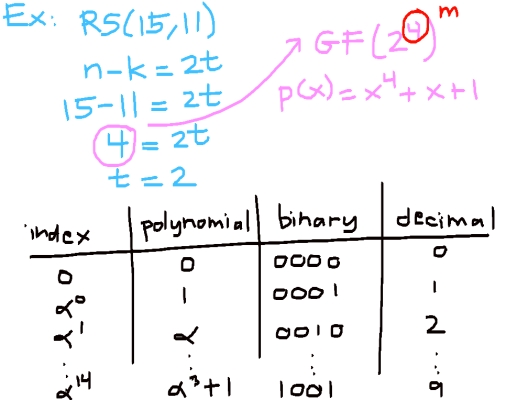
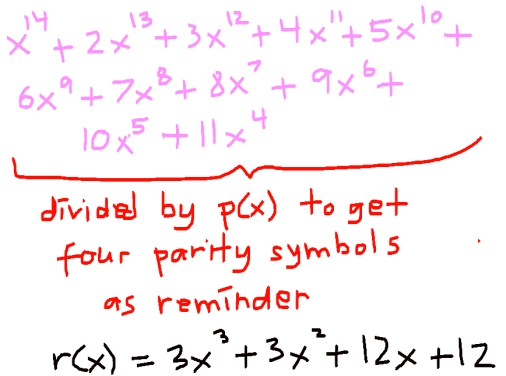
    Let’s take an example of RS(15,11). This means that we have the codeword with length 15 bits that consists of original message 11 bits  and 4 bits for parity. t is how many errors (in symbols or group of bits) that can be corrected.

    p(x) or irreducible polynomial is used to generate the finite field like shown in the table below.

    RS(15,11)

    Now we need a generator to start the encoding process.

    Generator

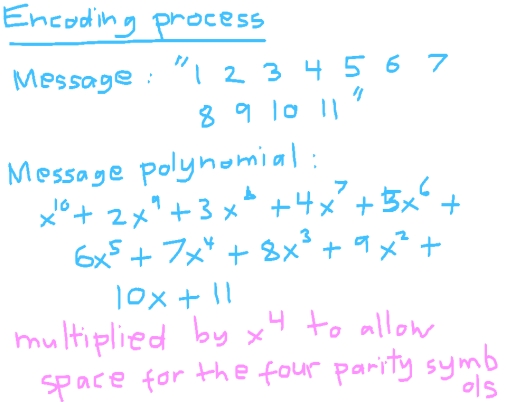
    RS Encoding Process 1

    RS Encoding Process 2

    RS Encoding Process 3

    The process of decoding includes several steps. Let’s take an example of double-symbol error.

    RS Decoding

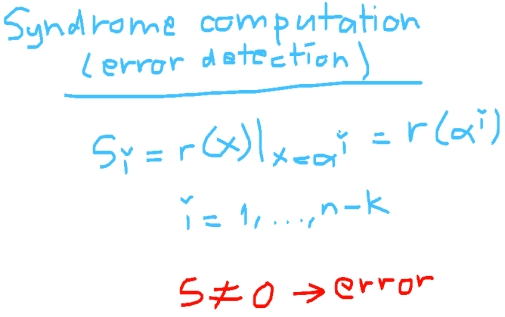
    The first process is computing the syndrome to detect the error. For this case will have 4 syndromes: S1, S2, S3 and S4. Each S that is not equal to 0 contains error.

    RS Syndrome Computation

    The second step is locating the error in e(x). This can be done using matrix.

    RS Error Locating

    After the location has been determined, now it is the time to calculate the values of the error so we can correct the error.

    RS Error Values

    Done. We get the message corrected. Do you notice that detecting the errors in symbols (groups of bits) in this method makes it runs faster?
     
    • ravi 1:41 pm on March 20, 2016 Permalink | Reply

      sir plz help me out wit the code it really cost me much……..

    • yuriydubov8sj 9:57 pm on November 21, 2021 Permalink | Reply

      For the life of me, I do not know.

    • kave 8:40 pm on July 10, 2023 Permalink | Reply

      this is very good until decoding!

  • CG 11:42 am on January 1, 2014 Permalink | Reply  

    2013 in review 

    The WordPress.com stats helper monkeys prepared a 2013 annual report for this blog.

    Here’s an excerpt:

    The concert hall at the Sydney Opera House holds 2,700 people. This blog was viewed about 17,000 times in 2013. If it were a concert at Sydney Opera House, it would take about 6 sold-out performances for that many people to see it.

    Click here to see the complete report.

     
  • CG 8:51 pm on October 3, 2013 Permalink | Reply
    Tags: xcode phonegap nodejs cordova   

    PhoneGap – Getting Started using Xcode 

    1. Download and install NodeJS and PhoneGap
    2. Type this in Terminal: (make sure you have a stable internet connection because this will affect the generation of the code like missing libraries, invalid structures of directories etc.)
      Screen Shot 2013-10-03 at 7.35.52 PM
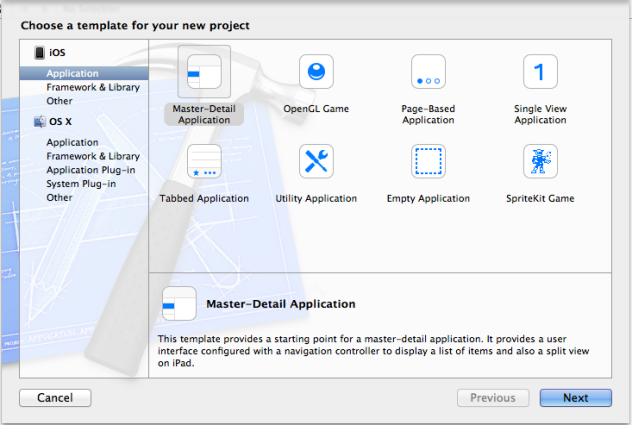
      You have to do this project creating and building on command prompt because in later versions of XCode, they do not give you to choose Cordova application or PhoneGap application when you start a new project like shown in this picture:
      Screen Shot 2013-10-03 at 8.55.02 PM
    3. Find the .xcodeproj and run it (it will be opened automatically in XCode)
      Screen Shot 2013-10-03 at 7.39.28 PM
    4. And then Run the project (by pressing the button on the top left) and you will get this
      Screen Shot 2013-10-03 at 7.49.22 PM
      You can modify the index.html or .js scripts and see how they look in simulator.An error usually occurs (the error message would be “index.html not found” when there is no index.html in www directory or the structure of the directory is not like shown below.Screen Shot 2013-10-03 at 7.59.58 PM

    Note:

    1. The version I’m using is Xcode 5.0, iOS Simulator 6.1, PhoneGap 2.9.0 and node.js v0.10.20. Running on Mountain Lion 10.8.5
    2. If you are using different versions in either of one of them, the result might be slightly different
     
    • Ripiu Info 9:29 am on December 5, 2013 Permalink | Reply

      Which one do you recomend, phonegap or native ios for newbie like me ?

    • www.hubmesh.com 11:27 pm on June 25, 2014 Permalink | Reply

      Many thanks for every other useful website. The place altogether different may possibly I receive that kind of information coded in a very perfect means? I’ve got a mission i’m right now operating upon, so i are actually with the be aware of similarly info.

    • Collum 9:22 pm on July 1, 2014 Permalink | Reply

      whoah this web site is usually amazing i like reading your content. Maintain the great work! You know, many men and women want circular with this info, you are able to encourage them to enormously.

c
Compose new post
j
Next post/Next comment
k
Previous post/Previous comment
r
Reply
e
Edit
o
Show/Hide comments
t
Go to top
l
Go to login
h
Show/Hide help
shift + esc
Cancel